


“How do you eat an elephant? One bite at a time!”
-Bill Hogan, 2004-
It would be easy to look at all needed to build Eldon C. Stutsman, Inc. and become overwhelmed. It’s a complex complex (pun intended) for any layout, but it’s key to The Hills Line… both prototype and model. Therefore, the key to my success is to take this ongoing project as a series of smaller, manageable sections. Fortunately, I have a good place to start this adventure with the tank farm at the southern portion of the line.

On the prototype, cars containing phosphoric acid and nitrogen fertilizer are spotted for unloading at the far end of Stutsman, probably due to their volatile nature. A small but rather eclectic collection of industrial tanks and pipes alongside the spur holds the various liquids. Despite the variety of elements, the compactness and relative simplicity make it a good starting point.
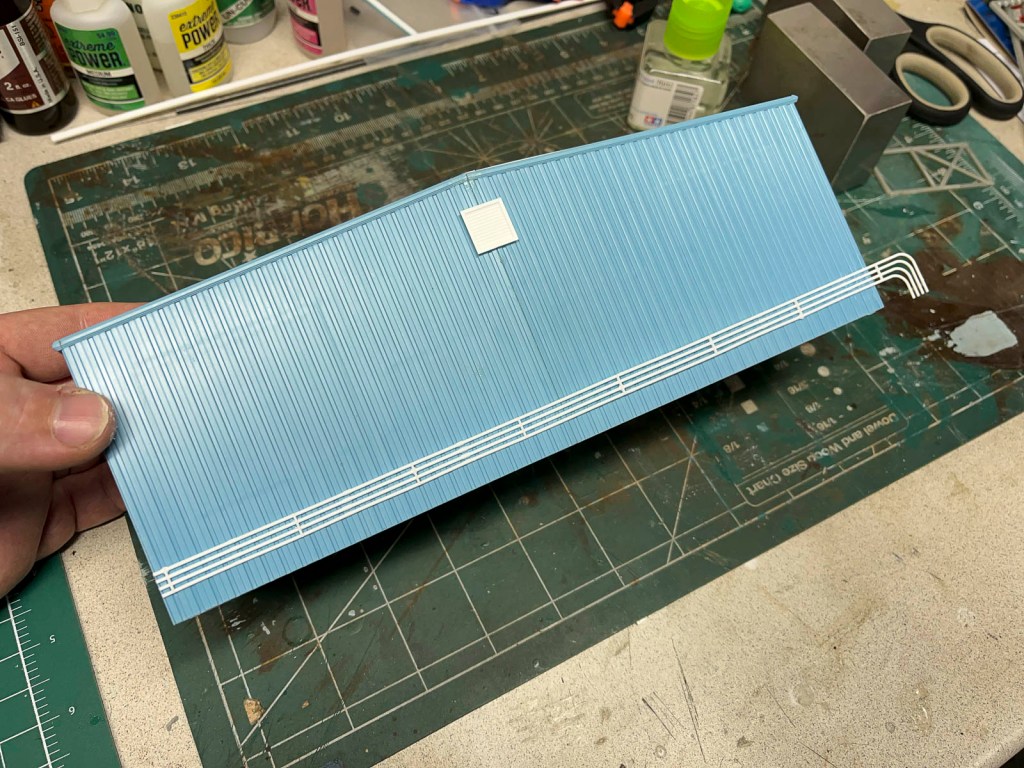
After studying photos of the overall arrangement, I started with parts from Rix and Pikestuff for building the main warehouse. Fortunately, only the backside was needed since the rest of the structure extends east of the industrial spur. Detail parts from Rix and Walthers help add depth and dimension to a relatively simple box.

The two main storage tanks were built from a Walthers Plastic Pellet Transfer Facility kit. I was impressed by the customizable kit, especially considering it wasn’t designed for any alternate configurations. The plethora of pipes and ladders I didn’t use will eventually find their way into other structures. The remainder of the tanks were from additional Walthers detail kits, again placing them in locations based on prototype photos.

The southernmost tank was kitbashed from a Rix Products Water/Oil tank. Since the backdrop curves at the end of the scene, I trimmed the tank so it sat flush against the rear wall. The piping was kitbashed using parts from a Walthers Refinery Piping kit and some Plastruct styrene girder pieces. Concrete footings will be added to the support girders after they’re painted.
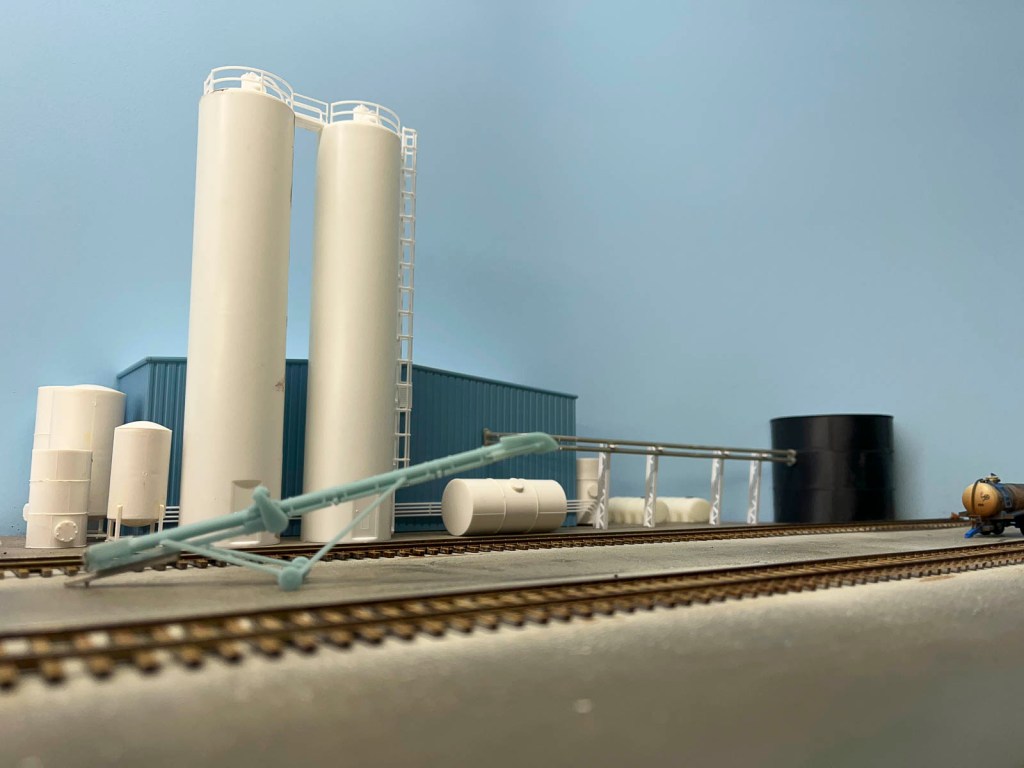
All the components were laid out in the scene to ensure the correct car clearances and spatial relationships. The next step is to paint, weather, and permanently install everything onto the layout with scenery and other details. For Stutsman, that’s one bite swallowed, many more to chew.

Great pointers James and I appreciate the detailed explanation! I face a similar challenge with a large coop elevator complex so this is inspiring!
LikeLiked by 1 person