


For the past ten months, I’ve written about The Hills Line at my blog on the Model Railroad Hobbyist website. Rather than completely rehash what I’ve already posted, I want to bring this site up to speed with where the layout stands today in a three-part series highlighting the progress made so far.
Part Two discussed the decision to forgo a valance and why the backdrop is a consistent shade of blue.

Even without a valance, I still wanted to focus more light on the layout than in the room. Advances in LED technology have made lighting cheap, simple, and powerful. Linked-LED strip lights were continuously installed over the layout, providing a lot of even light with no heat build up.
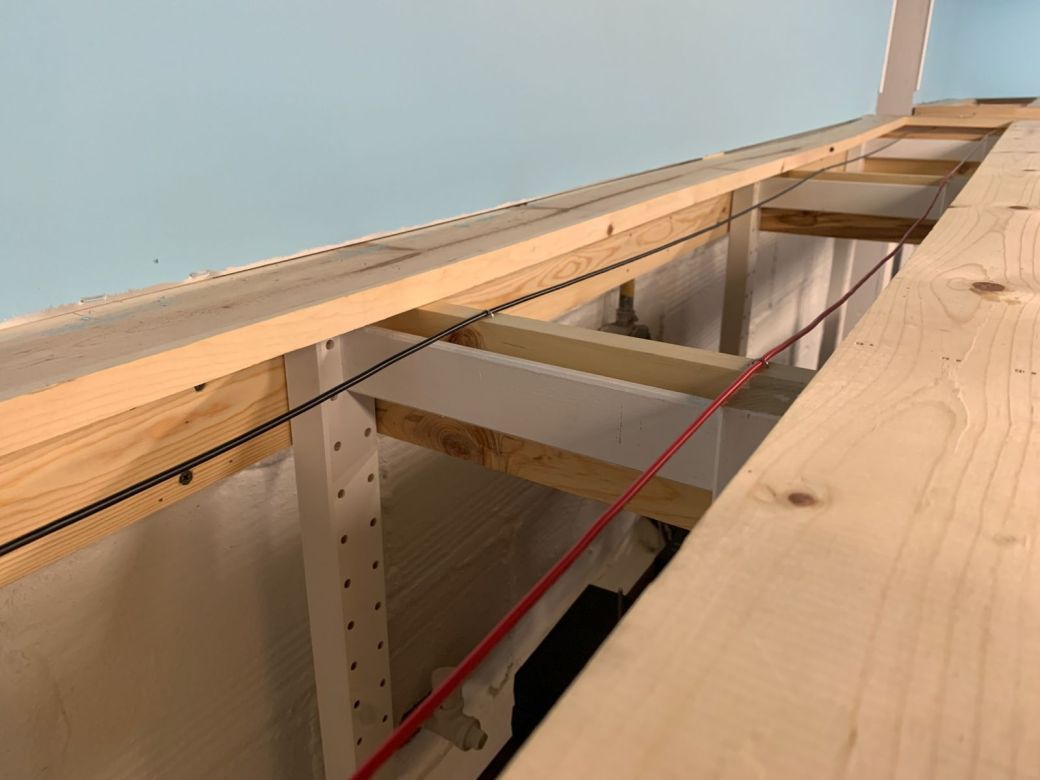
Before covering it up with roadbed, I ran the bus wiring around the benchwork interior. In Part One I mentioned how the modified L-girder created a trough for running cables. This extra clearance should come in handy when I start hooking up feeder wires to the bus.

For the roadbed itself, sheets of two-inch extruded foam board were cut to fit and glued to the benchwork. The fascia was made with 1/4-inch underlayment plywood ripped into 6 inch strips, tacked to the benchwork, and edged with pine outside-corner trim pieces.
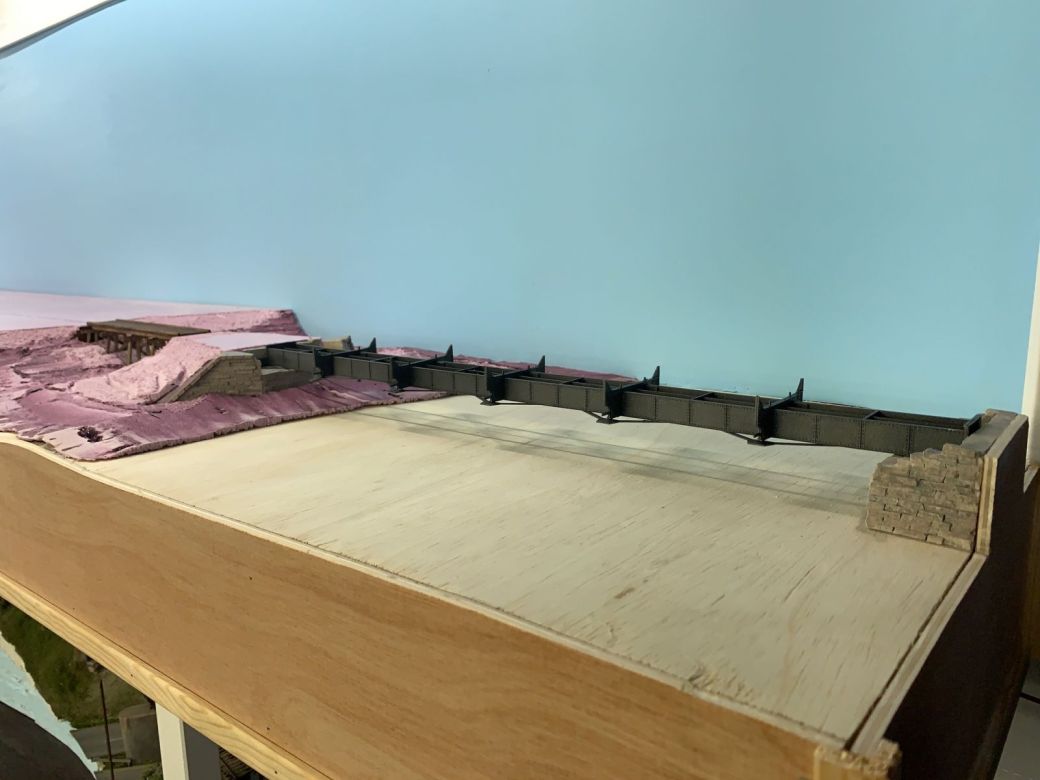

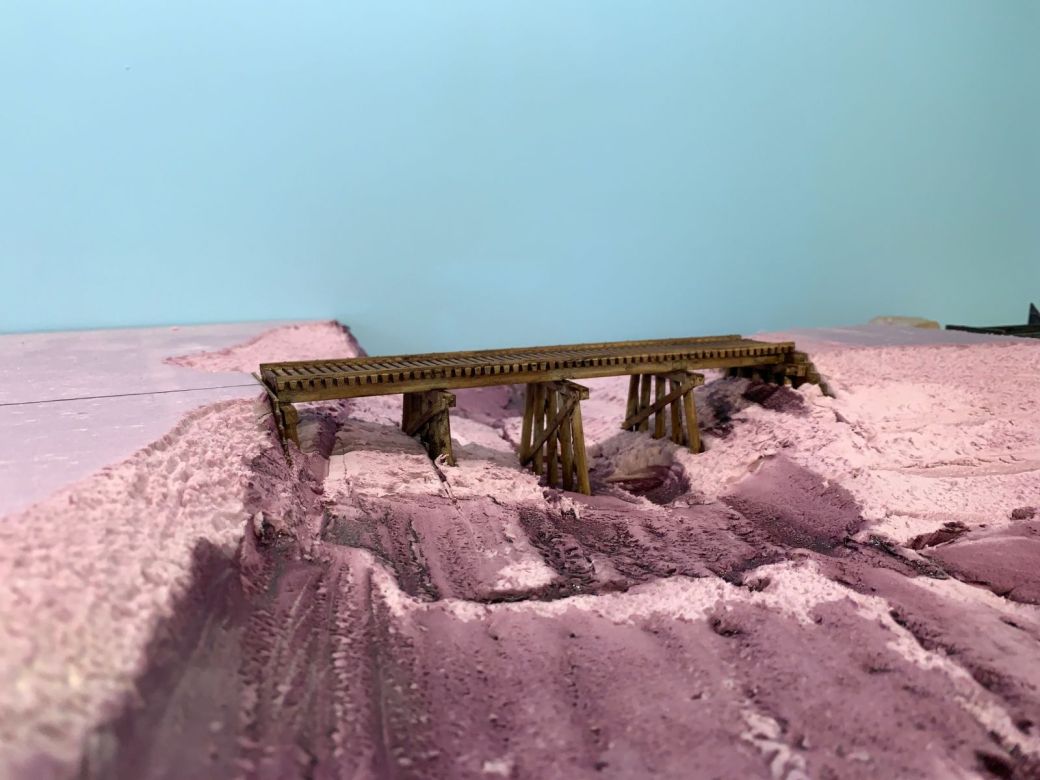
While most of the layout will be flat, the foamboard gives me enough material to carve away for the multitude of waterways found on the prototype. The Iowa River drops down to a plywood base to show the depth of that body of water, while the shallower Ralston Creek was carved into the foam directly. Gaps and seams were filled with DAP Alex Flexible Spackle.

And finally, first steps were made on the signature scene of The Hills Line, the Iowa Interstate’s deck-girder bridge over the Iowa River. Abutments from Monroe Models/AIM Products were modified and painted to best match the prototype while two Micro Engineering deck girders span the gap to the aisle. To avoid the bridge to nowhere look common on a lot of layouts, a fascia extension covers the front of the span.

I like the commentary and appreciate the absence of clutter and fuzz in the presentation.
LikeLiked by 1 person
Have you had any issues with the pink foam being inconsistent in thickness leading to slight high and low spots that free rolling wheels find and roll away from where is was spotted to 2-4 inches away. I had this problem with my last layout and now I am deciding whether to use the foam again. The advantages of the foam are pretty obvious but I ;d like to know if you have had any trouble. – Nevin
LikeLike
None so far, but I’ve taken the steps of leveling the foam sheets to prevent that from happening
LikeLike
Hi.How did you leveled you foam sheets? I wanted to use foam as my subroadbed to, but has some issues with it….
LikeLike
The modified L-girder benchwork I built is essentially open grid with a top frame. The foam then gets supported on all sides. Where there was significant sagging I shimmed, but otherwise left some of the undulations in place.
LikeLike