Let’s open up the ol’ Hills Line mailbag…
I see you do stacked focus photography…could you dedicate an article about it for us newbies?

Stacked photography has fundamentally changed how I document and share images of The Hills Line, both online and in print. I had seen what others, notably Paul Dolkos, had done with model photography and wanted to do the same. It just took technology a while to get to the point where I was capable and comfortable in making it happen.
Step One: Shooting the Stack

First off, I no longer use my DSLR for any layout photography, stacked or otherwise. My iPhone XR has far superior image quality in a smaller form factor, allowing me to get it into tight quarters on the layout. I can quickly AirDrop images to my laptop for editing and retouching.

Second, I don’t use the built-in camera app on my iPhone, since it does not offer the ability to easily adjust focus, white balance, ISO, and so on. Instead I use the CameraPixels app from Basic Pixels, which offers full-manual controls and the ability to bracket images.

I start by framing a decent image. The techniques that make appealing compositions are well beyond the scope of this entry, but needless to say focus stacking will not make a bad image better. Take your time and find an angle that tells a story by focusing and directing the viewer to what you want them to see. For model railroad photography, a good rule of thumb is to get low and tight.
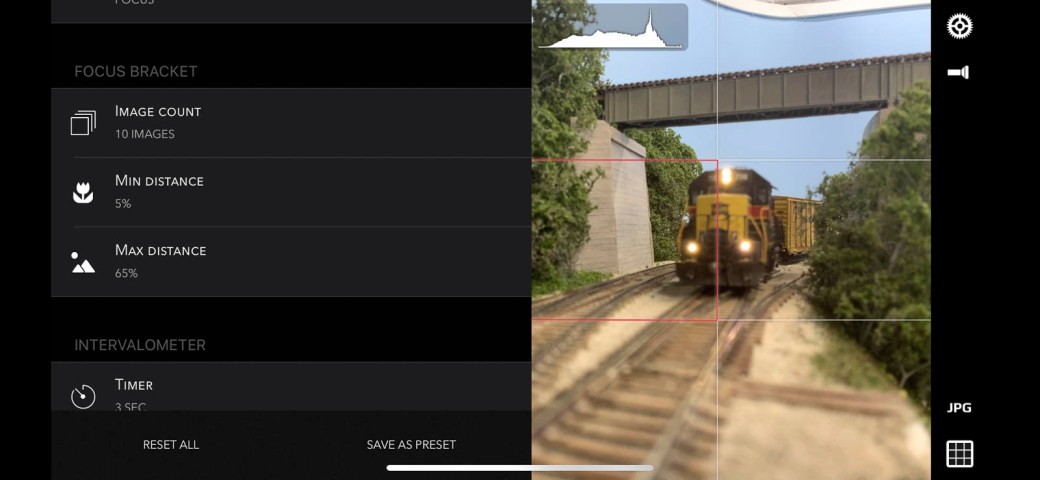
Set the bracket type to Focus and adjust the minimum and maximum focus distance. You can roll through the manual focus to find the range. I generally set the image count to 10, but will increase that number if it’s a deeper scene.
Once set, release the shutter. Since there are no moving parts on an iPhone the camera quickly and cleanly advances through the focal distances without having to adjust the lens. That means you don’t have to worry about bumping the camera when adjusting focus and ruining the take.
Step Two: Stitching Photos Together
The application of choice for creating stacked photos appears to be Helicon Focus. However I can’t offer a review or recommendation on my own, since I use Adobe Photoshop for all my image manipulation needs. Photoshop will create stacked photos just as Helicon Focus does, it just doesn’t do it automatically.
What I will say is that both applications are significant investments of time and money. As with any new venture, make sure you’re prepared to tackle the cost and the learning curve. When all else fails, read the manual.

In Photoshop, load the individual images into a stack, and check Attempt to Automatically Align Source Images. Since there should have been no movement of the camera while the images were being taken, there should be little adjustment after the fact. This step just cleans up any inconsistencies.
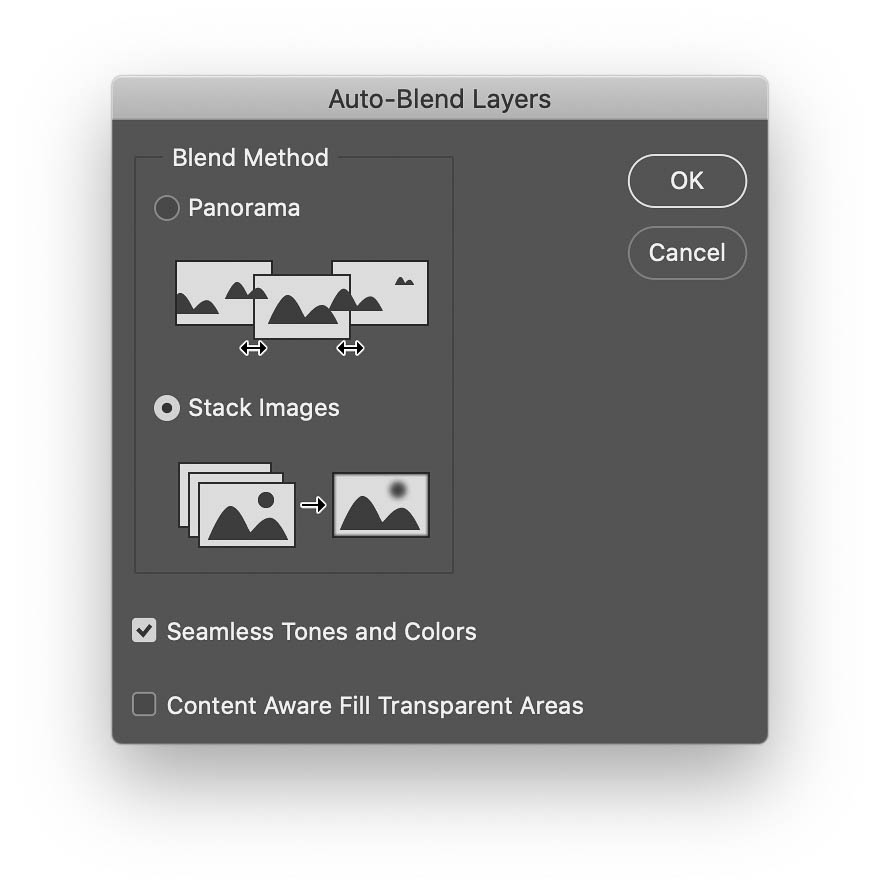
Then, run Auto-Blend Layers with Stack Images selected. This is a time-consuming process depending on the processing power of your computer, so you may want to walk the dog, change the oil, or do your taxes while this runs.
Once finished, Merge Layers into one complete image. If you were successful in taking the individual pictures, your stacked photo should be sharp and clear.
Step Three: Crop and Clean
With any stacking process, there will be some areas of fuzz. You can try to retouch those spaces, but I generally crop the image to remove any irregularities.
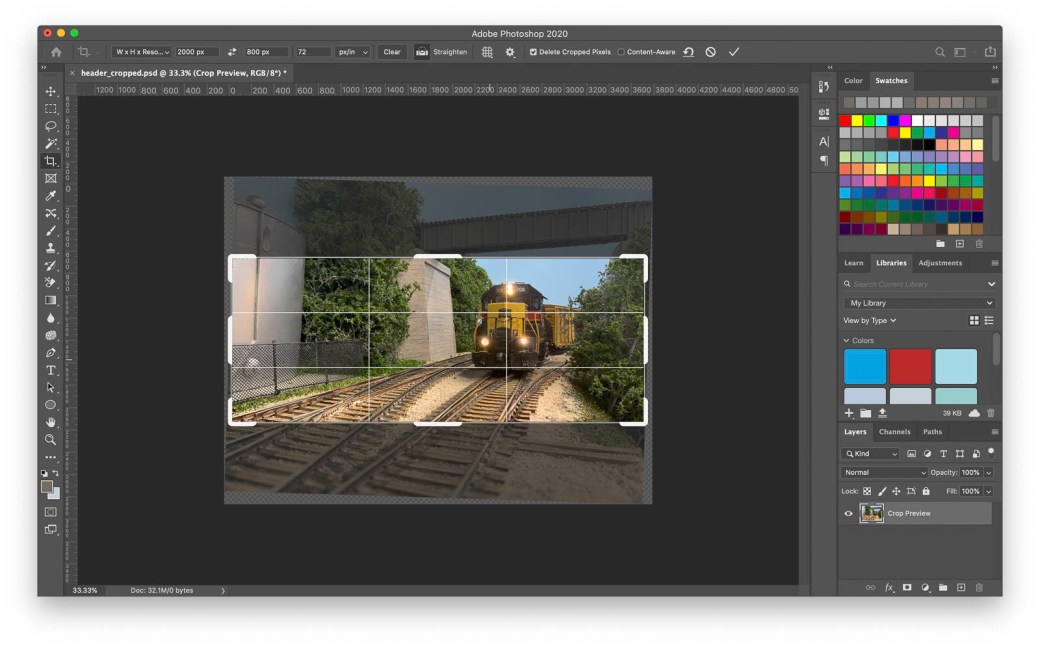
I’ll finish by cleaning up any other areas I want to save, perform some basic color correction, and export in either a print or web-optimized format, depending on how I’m delivering the photo. In this case, an updated banner image for thehillsline.com that shows off the new scenery* around Iowa City.
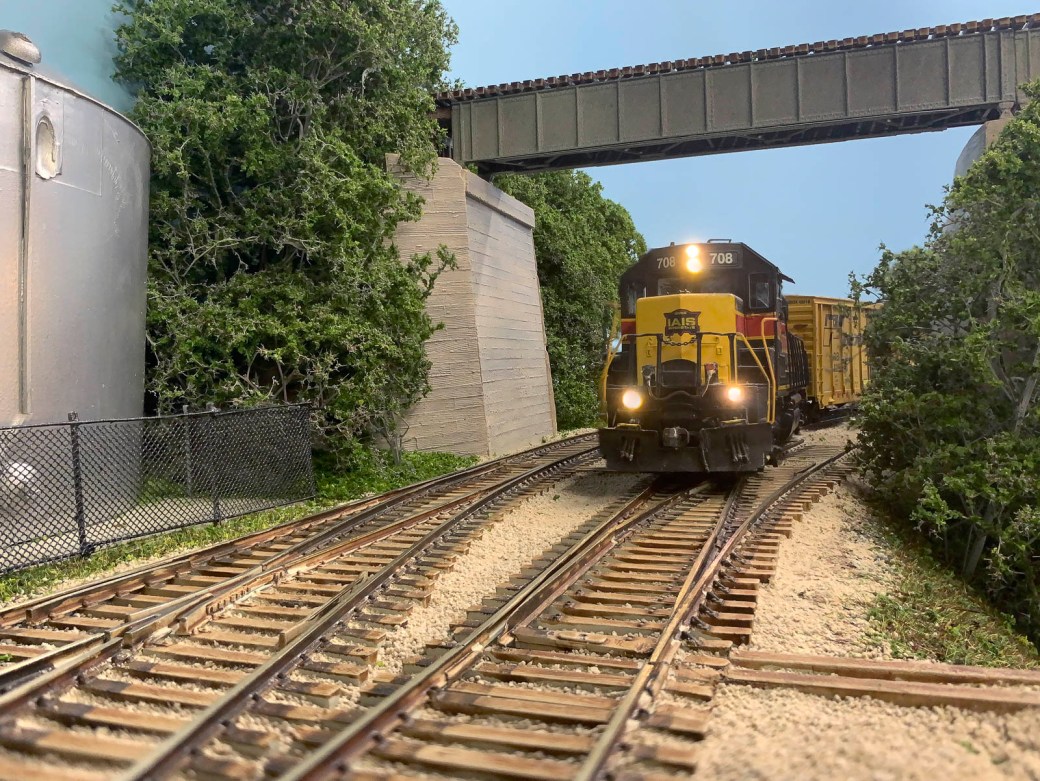
*= Yes, I know I haven’t mentioned scenery yet. Don’t worry… I’ll get there.


Thank you for sharing. I am just starting to understand stacking and this helps. I also love you sharing how you are using your iPhone.
LikeLiked by 1 person